Your monochrome images don’t have to remain colorless. Adding selective color back into an image gives you total control of the crafting of your image, something photographers crave. This allows you to introduce exactly the color(s) you want.
Conventional coloring of photographic images can be in one of two
forms: toning and hand coloring. Toning involves either the overall
coloring of an image through a chemical treatment of a print or
multiple coloring through ‘split toning’ where several different colors
are produced in different parts or tones of an image through successive
treatment of a print. Hand coloring requires the printing of a black
and white image, perhaps a little lighter than normal, and then the
application of color. The color can come in the form of color pencil,
watercolor pencil, watercolor paint, oil paint or inks. There are even
specific products available designed just for the hand coloring of
photographs. This process can be quite laborious.
Hand coloring is a traditional process that was developed before color
photography was technically available to meet the demand for color
photographic images. At one time this was a huge employer of talented
women (usually), with most black and white portraits hand colored.
Traditional hand coloring produces lovely pastel-toned images, usually
of people or romantic subjects, like flowers. A recent revival in the
hand coloring of conventional silver-gelatin photographs has occurred,
being most visible in various series of greeting cards with nostalgic
images of 50’s and 60’s period cars, etc.
In this and following tutorials in this series we will cover a range of
techniques. In software like Photoshop, Paint Shop Pro or PhotoPAINT
there is rarely only one way to do something. In Part 1 we showed one
way to convert a color to a monochrome image. Later in the series we
will revisit this and cover some of the other ways. Likewise in this
article we will give one way, the author’s preferred way, of toning an
image digitally. In part 3 we will show a different way.
Digital Toning
Digitally producing an overall coloring to a monochrome image is a very
straightforward process. The steps boil down to the following:

1. Open the monochrome image or convert a color image to monochrome.
2. Convert the monochrome image back to RGB mode.

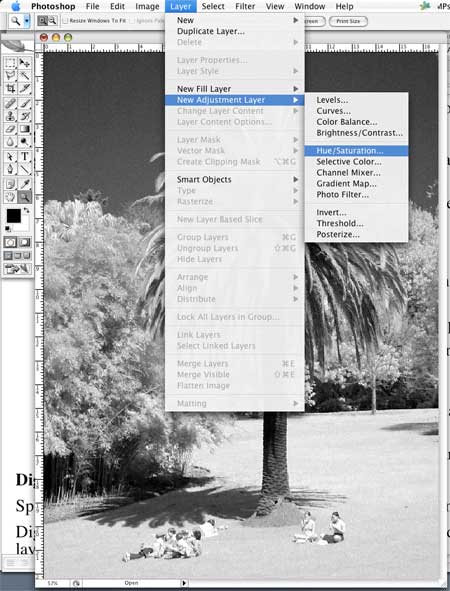
3. Create a Hue/Saturation Adjustment Layer. In this
case it really doesn’t matter if you tie it to the underlying image
layer or not.

4. Click the Colorize checkbox so that you can add color to
the image. In the H/S dialog the Hue controls the color that you
‘tone’ the image.

5. The Saturation (and Lightness) controls allow you
to further adjust the toning from a very strong to a very subtle effect.

6. The beauty of Adjustment Layers is that you can
come back anytime and make further adjustments, as here where we have
gone from a cool to a warm tone.